Monday, June 10, 2013

Whiteboard-inator!!! (Part 1)

Some of you who know me may be aware of my (allegedly unhealthy) obsession with whiteboards.  I assure you, it is not getting any better.

Here, you will see the newest addition to replace the old 4x3 board.  This is a full 4'x8' panel... which had to be carried home aboard my Yaris.  If you don't know, Yari... Yarises... Yarae.. these cars are TINY.
The panels are sold as "white panels" in the trim section of most Home Depots and work great as whiteboards.  They're also cheap, considering I spent $12 on the 4x8 sheet and they'll cut it to smaller sizes for free.

"But what's that around it?"  I'm glad I asked, because it gives me an excuse to explain PHASE 2!!! You see, I'm lazy AND a control freak.  If I could, I would make everything internet controllable and have them all sync to my phone.  (I'd also like to take guitar lesson from Brad Paisley and attend Scarlet Johansen's yoga classes, but that's later.)  So, why can't my whiteboard be the same way?

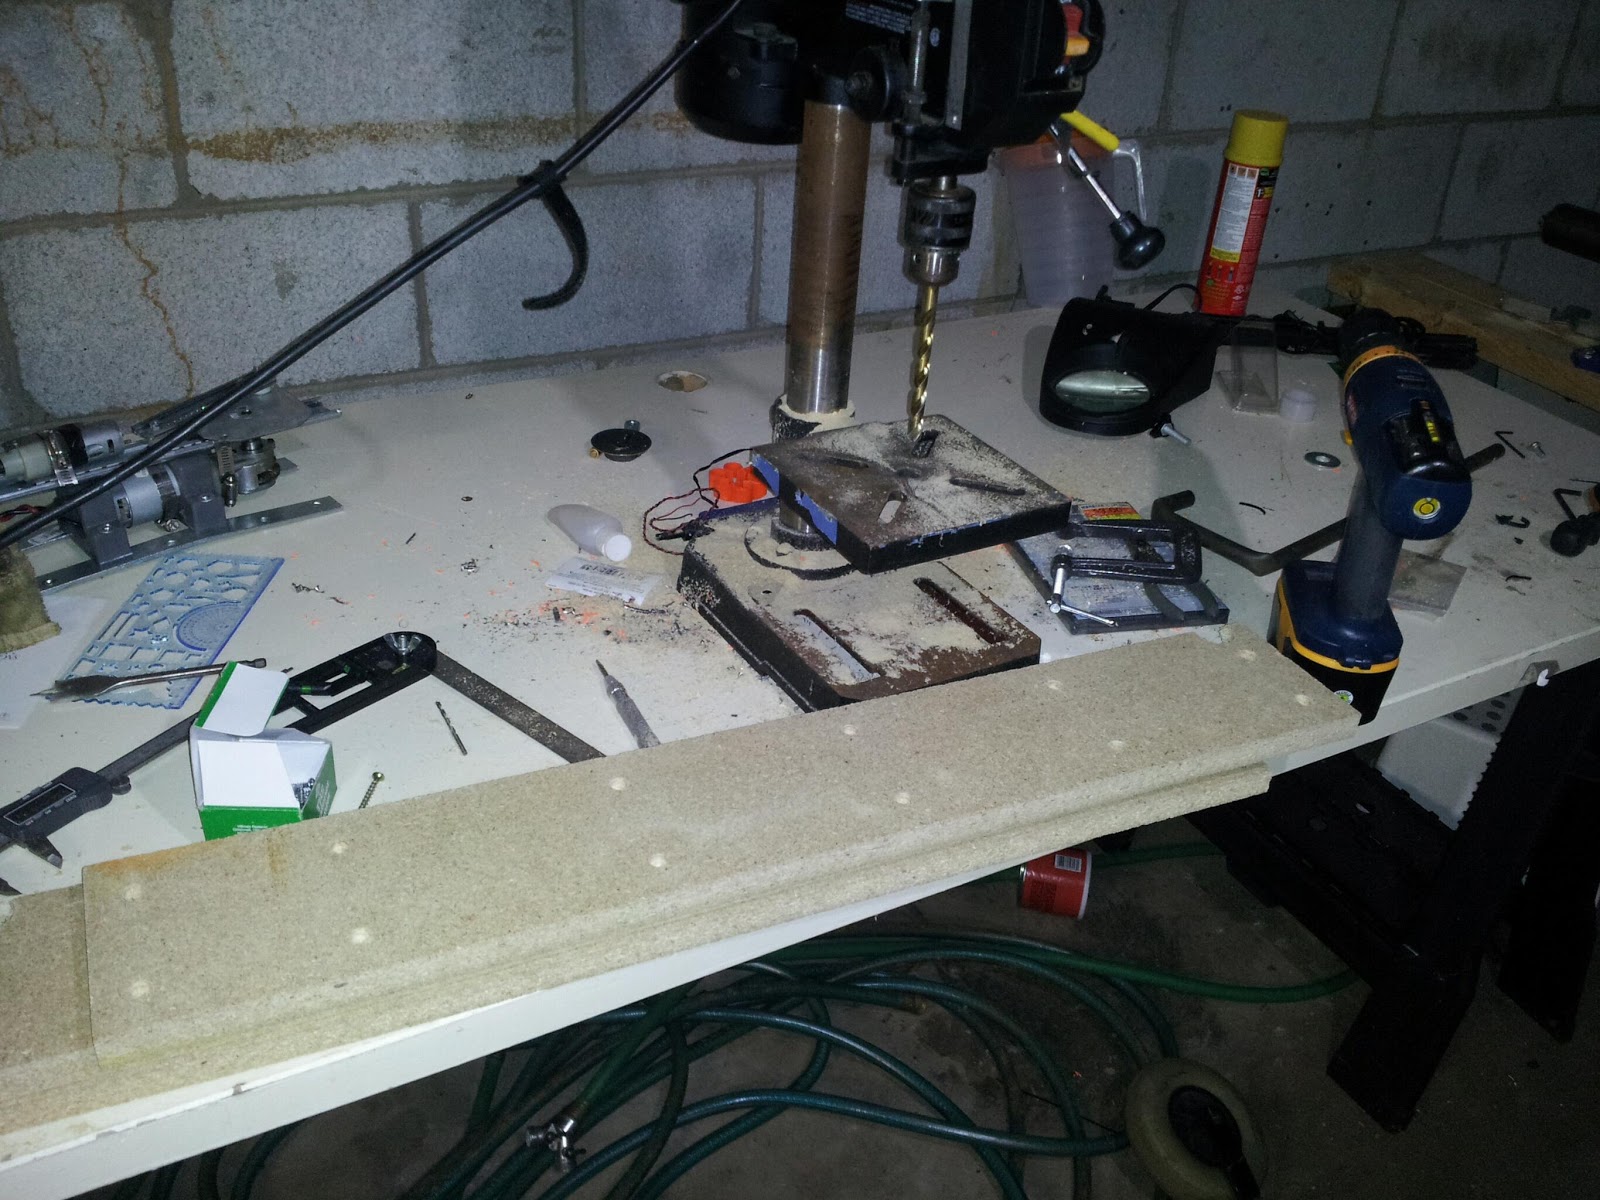
I started with 1/2" EMT (yes, the metal conduit stuff).  They're sold in 10ft sections, so I bough 3, cut one in half, and built an X-Y frame.  3/4" PVC pipe provides both structure AND a convenient bearing surface.

The initial idea was to make a linear bearing using beads, paper clips, and mdf.  I made a prototype of this system and it turna out that PVC on EMT has less friction.  So, it slides right now.

I went on an inkjet rampage a while back and harvested a bunch of steppers.  An arduino motor shield later and I should have a working slide table soon.

Monday, March 18, 2013

Rocket Stove

 So I called up a local steel place and explained what I was building and what I needed.  He said he had quarter-inch 6" mild steel square tubing in some rather short lengths left over scrap from a job.  Showed them to me and charged me $30.  They were 36", 24", and 18" respectively.

Did some cutting and grinding at home, but did the welding at school.  The legs and bottom cap are some pieces I rescued from the scrap bin.

Painted it with High-Temp BBQ paint.


The hole in front is covered up with another scrap piece.

Drawings and measurements
Stove in Action.  That's a dura-flame in the fuel magazine and the flame is burning downwards...

After a few firings using a Dura-flame log, results are rather good.  Body got hot enough to glow a dull red, so I'm guessing  in the ballpark of 600-700 degrees F.  Flame shoots out about 6-inches from the top of the stack, so considering the burn chamber is about 20" and a 30" stack, that's a 4 foot flame.

Future plans:  A 55 gal metal drum for a heat collector and some Fiberglass tape to insulate the body and the stack.  Why?  I'm going for portability, so wheels will eventually be stuck to those stubby legs and it will be moved about wheel-barrow style.

Thursday, March 7, 2013

Breathing Troubles

I don't know if I'd mentioned this here, but I have Guinea pigs... Long story short, Pigs eat hay and I have developed a very bad hay allergy.
To help alleviate this, I bought 2 20" box fans, 2 very good filtrete furnace/AC filters, and some masking tape.  I found the plans (if you can call "tape filter to fan" plans) on google.

Honestly, I was skeptical, but they seem to be working.  I run them on slow, and a lot of air gets blown back, but I'm going for a cumulative effect and am really just trying to clear all the air.  Also, it keeps noise down.

Sunday, February 10, 2013

Nerf RoughCut 2x4

Ok, so if you didn't know, I'm a pretty serious Nerfer... nerf-er... someone to plays with foam dart blasters.  So serious, that I co-started a nerf club in my college and run 100 person HvZ games with a few of my friends.

Anyway, this post is about the new(ish) Nerf Roughcut 2x4 'shotgun' blaster and my modification with a Nerf Raider front grip.

Rather simple mod, just pop off the original priming handle, test-fit the raider handle, shave off some plastic to make space for the pegs to fit, and close everything back up.

My first attempt landed the raider priming handle too far back, so it didn't prime correctely.  So I fitted it as far forward as I could.  When uncocked, the handle sticks out a little, but it's nothing terrible.  I also shaved off some of the slide railing guide from the raider handle.

I also experimented with replacing the AR springs with AR springs from a hyperfire. Thinking "If I can slow down the valve closing, more air can flow through..." unfortunately, it closes too slowly and ends up dislodging the "next" dart.  Lesson, the hasbro guys know what they're doing.

Lastly, before I buttoned her up, I shaved a bit off of the short trigger leg ( you'll see it...)to make it a smidge shorter.  "Half-pull to only shoot 1 dart is easier now.

I'm super-happy with it now, feel is great.  Priming is fast and the blaster shoots far and straight.

Sunday, February 3, 2013

PROJECT MANAGEMENT

So, I found this rather cool website when I went to check out the areal... aereal... Aerial Robotics team. 
Check it out, it's a lot like an automated todo list for group projects and let's people take on and keep track of segments and sub-projects rather pretty easily.  Kinda new-ish (as of writing this) so more features to come I bet.

TRELLO

Friday, January 11, 2013

Finding Stepper Motors in Printers

So, growing up I always heard that if you want to get cheap stepper motors, gut an old printer or scanner.  [Why, what were you told growing up?]

A printer needs a minimum of 2 motors.  One to move the inkhead back and forth and another to advance the paper.  So, theoretically, you can get 2 small stepper motors for the price of a used inkjet (so free, if you're vigilant on trash day).

Anyway, newer printers have moved away from this and are now using DC motors and an encoder.  So, while this is much cheaper for the manufacturer, it's no good for us.

In any case, just look inside the printer at the ink carrier, that's the little shuttle that carries the ink cartridges.  It will have a toothed belt behind it, and be travelling on a smooth, shiny steel rod.
If you see grayish transparent ribbon running parallel to the rod,that's the encoder.  This setup uses plain dc motors.  If the ink carrier uses an encoder, you can be sure the paper feed does too.  Save your money and look some more.

Don't worry, I tossed the carcasses into the recycling bin afterwards.

Tuesday, January 1, 2013

Bluumax hold-down and surface install

Holy crap, look how well that fits.  I swear I don't plan this stuff...

That platform is supposed to be 16" as per bluumax spec.  Each rail is .75" and the wood things are 4.5"-ish. So 4.5x3 + .75x2 = 13.5+1.5=15... Wut?

Late Christmas

Did a bit of shopping, and checked the mail.

Arduino motor control shield and some chips came in!  Gonna install some T-track rails on the mill and got some sacrificial surface boards.  And finally, Exhaust wraps to insulate my rocket stove.  Exciting stuff!